

Mastering Your MacBook: Essential Tips for New Users Transitioning from Windows
This comprehensive guide is designed for users transitioning from Windows to MacBook. It covers essential tips and tr...
The laptop touchpad, also known as Touchpad, is a design specifically for laptops and is equipped with touch sensitivity. Thanks to that, you can easily control the mouse cursor as desired by moving your finger on the touch surface.
Laptop touchpad is favored by users for its convenience and compactness. You don’t need to carry an external mouse to use the laptop, saving space and making it easy to move when traveling.
However, while composing messages or text with the keyboard, you often accidentally touch the Touchpad, causing the mouse cursor to move unintentionally. That’s why many users choose How to Enable Laptop Touchpad quickly and simply to meet their needs.
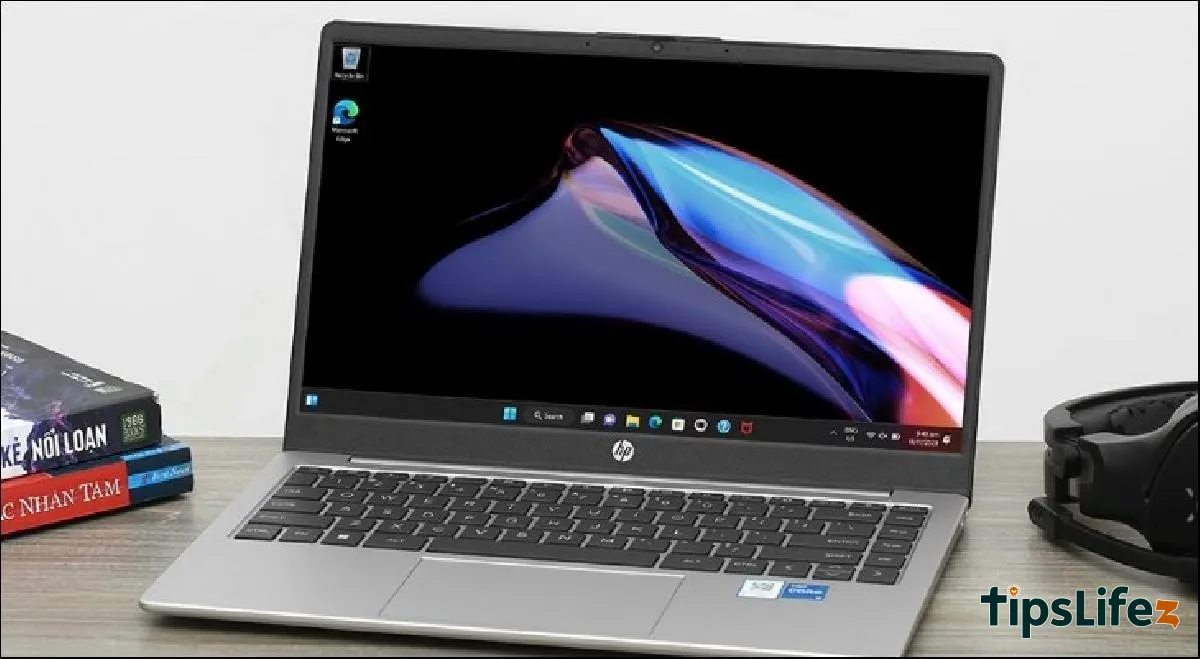
Laptop HP 240 G10 i5 1335U (8F134PA) with a wide touchpad area for easy use
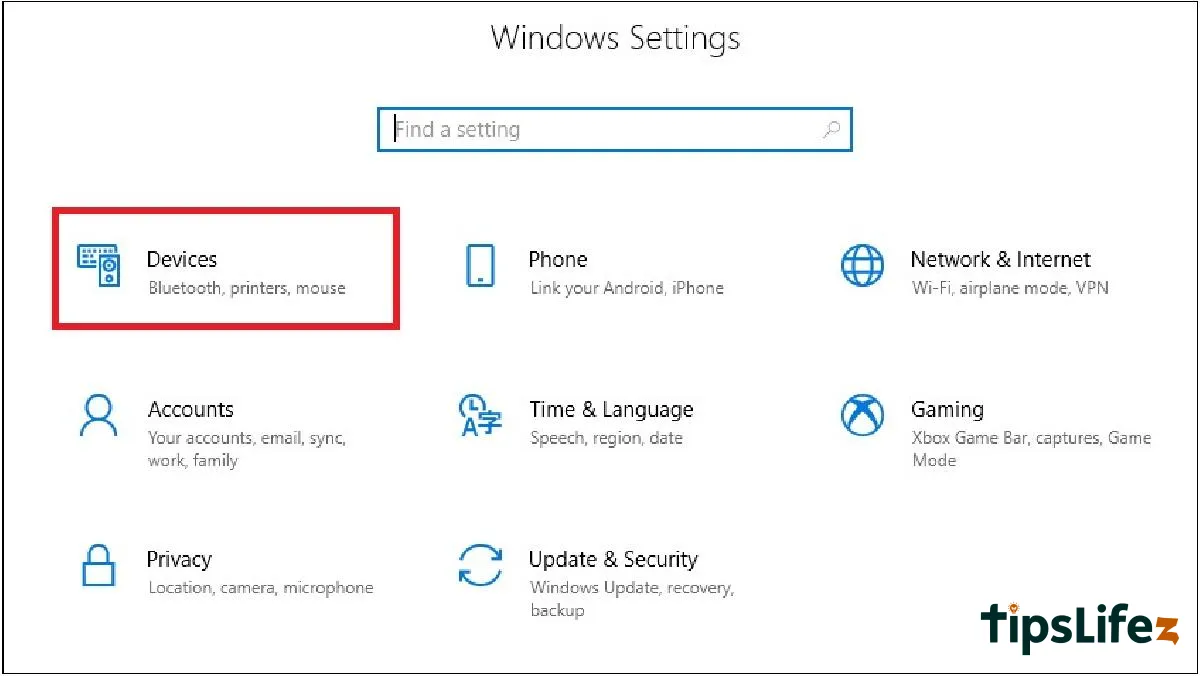
Step 1: You press the Windows + I key combination to access settings (or you can search for Settings and select) > Then select Devices.
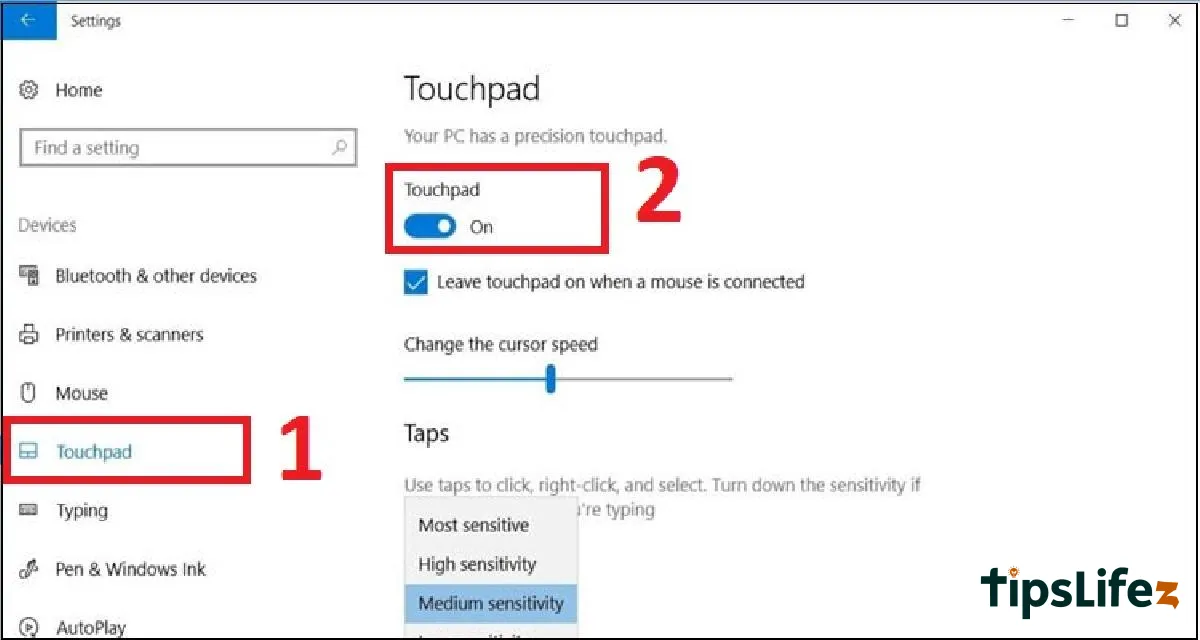
Step 2: Select Touchpad on the left interface > Click on the slider under Touchpad to turn the touchpad On or Off.
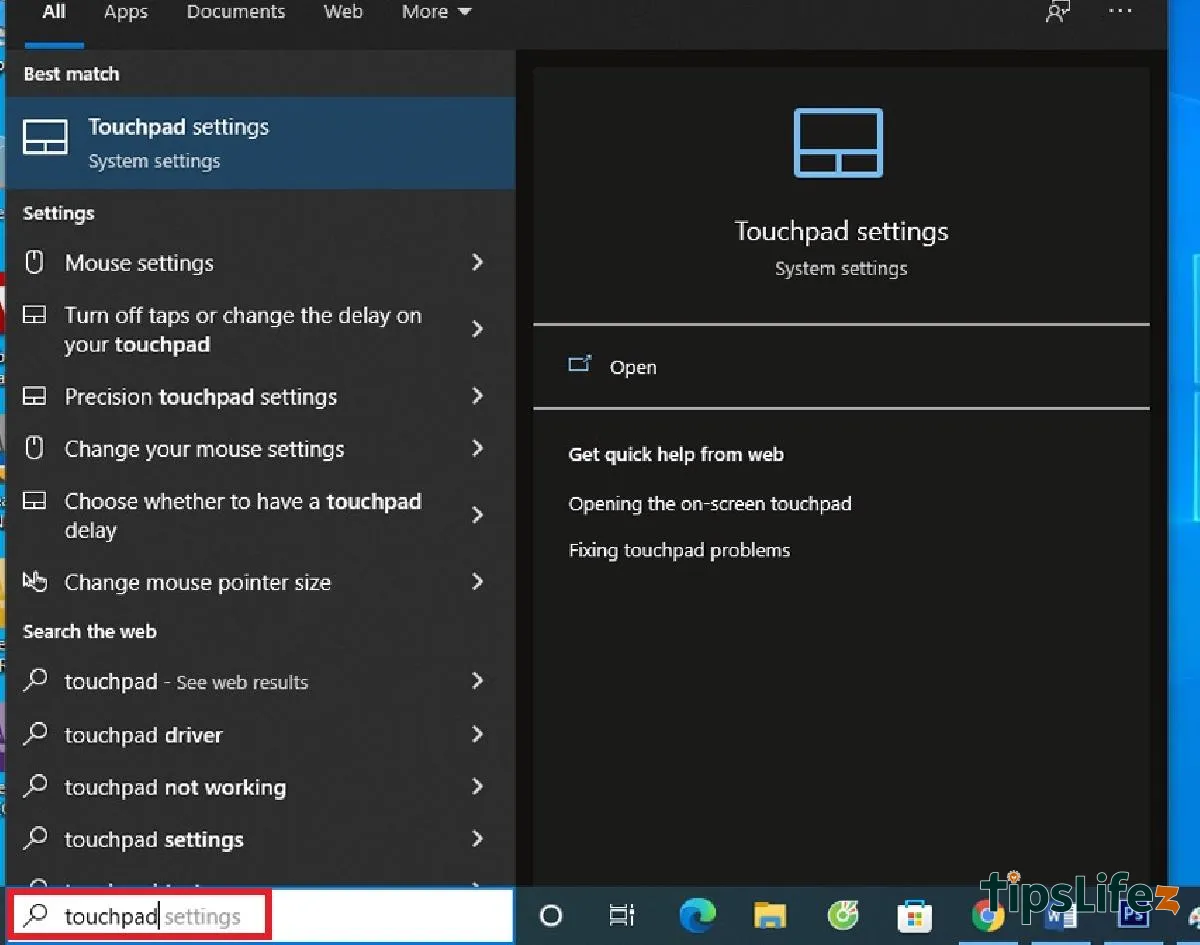
Step 1: On the keyboard, press the Windows button > Type the phrase touchpad > Then press Enter.
Step 2: Here, you need to press the Space bar key on the keyboard to turn on the touchpad.
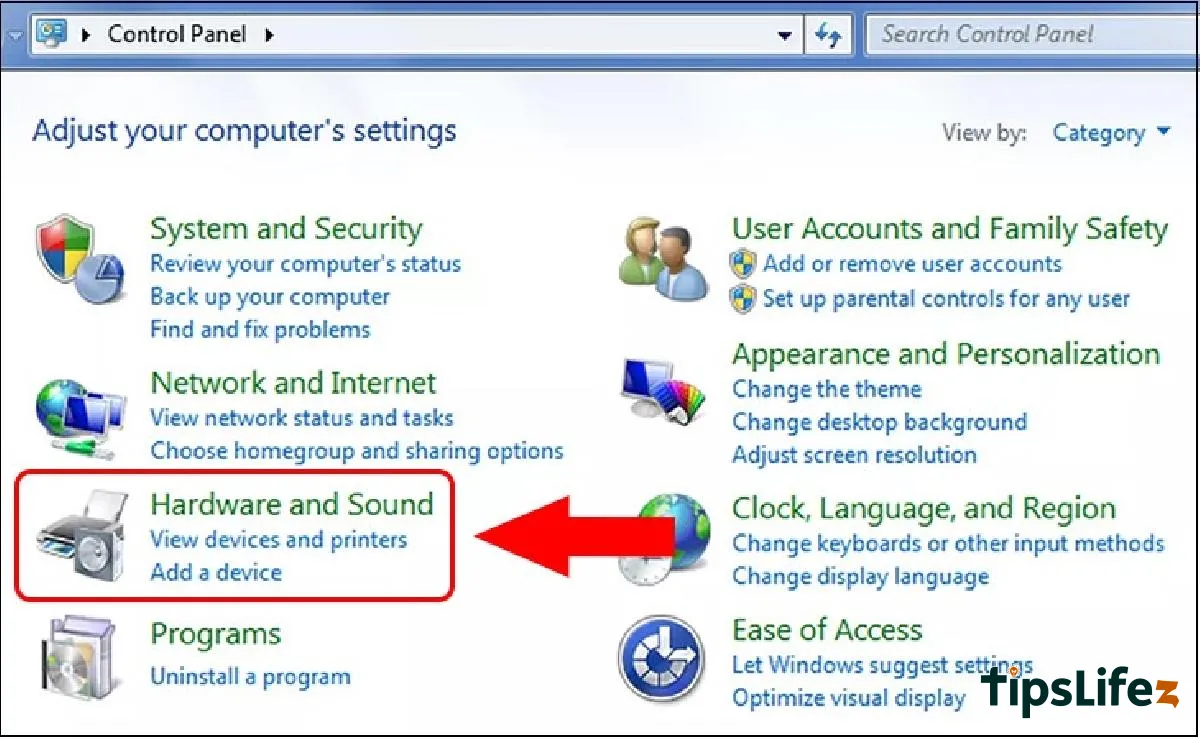
Step 1: You click the Start button in the bottom left corner of the screen > Choose Control Panel.

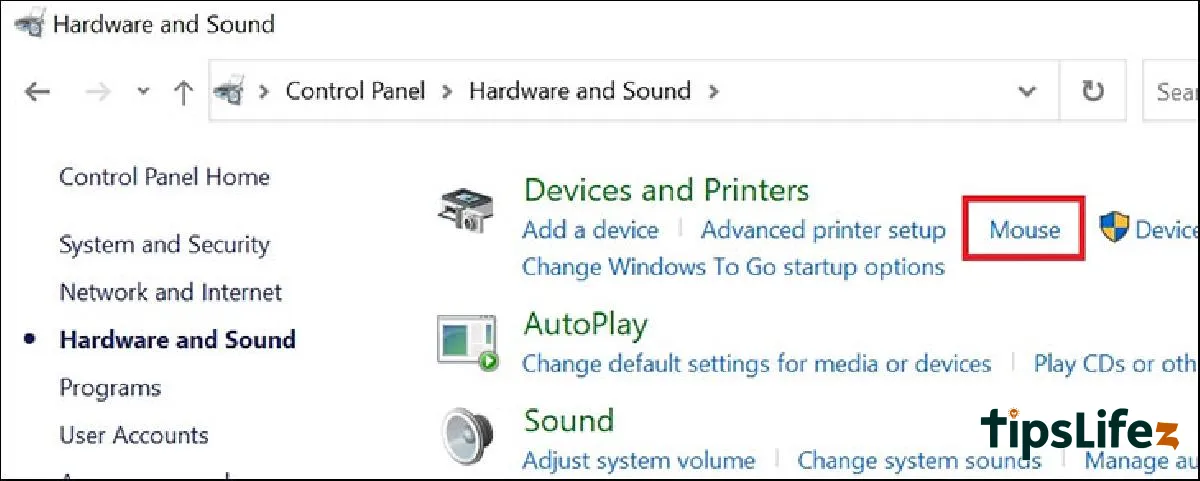
Step 2: Click on Hardware and Sound > Select Mouse.
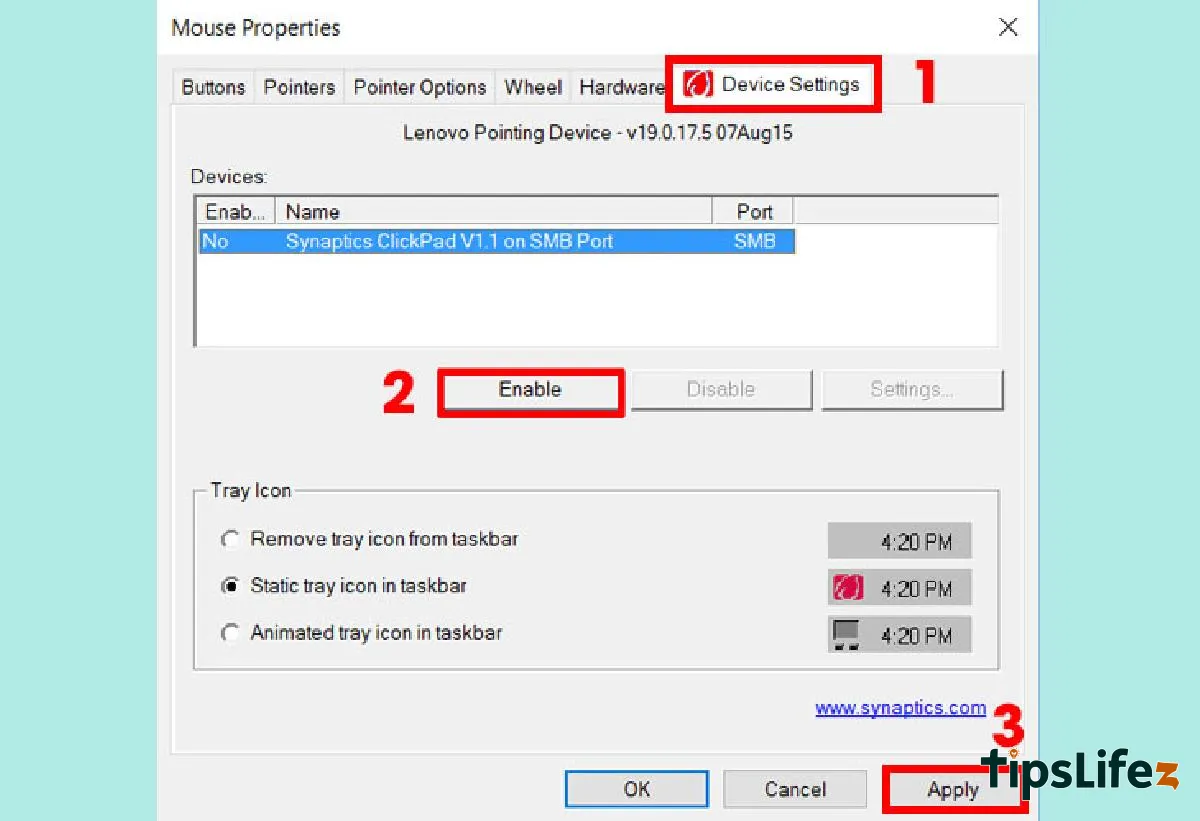
Step 3: When the Mouse Properties tab appears, select the Device Settings tab > Select Enable to turn on the touchpad, or Disable if you want to turn it off > Press Apply to save the changes.
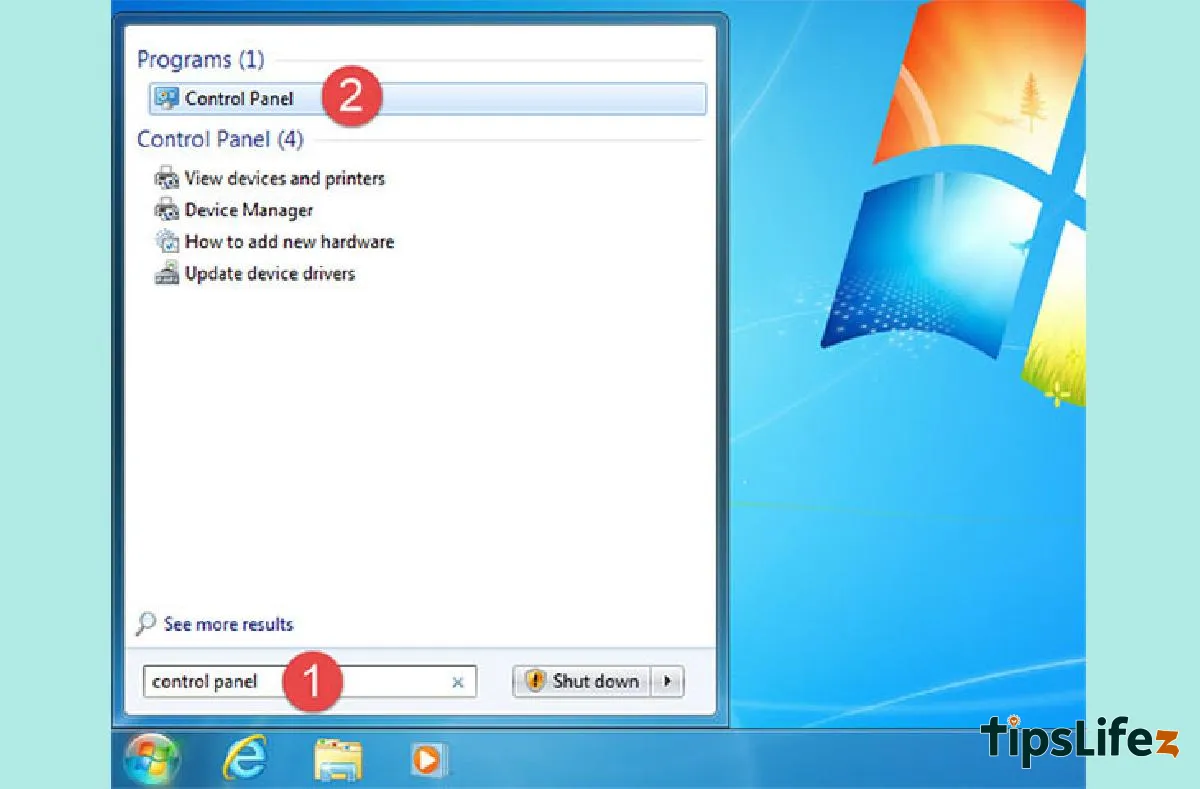
Step 1: Press the Windows button on the keyboard to bring up the search window > Type the keyword Control panel > Then press Enter.
Step 2: Use the Tab key on the keyboard to navigate to and select Hardware and Sound > Press Enter.

Step 3: Continue using the Tab key to move the selection to the Mouse item > Press Enter. The Mouse Settings window appears, press the Tab button to expand the selection > Press the right arrow button to move the selection to the Device Settings item.
Step 4: Use the Tab key to move the selection to the Enable button to turn it on (or Disable to turn it off) and press Enter. Then, press the Tab button to move to the Apply button and press Enter.

Above is a detailed guide on how to quickly and simply turn on/off the touchpad on a laptop. Hopefully, the above information will be useful and help you use the laptop more smoothly.
This comprehensive guide is designed for users transitioning from Windows to MacBook. It covers essential tips and tr...
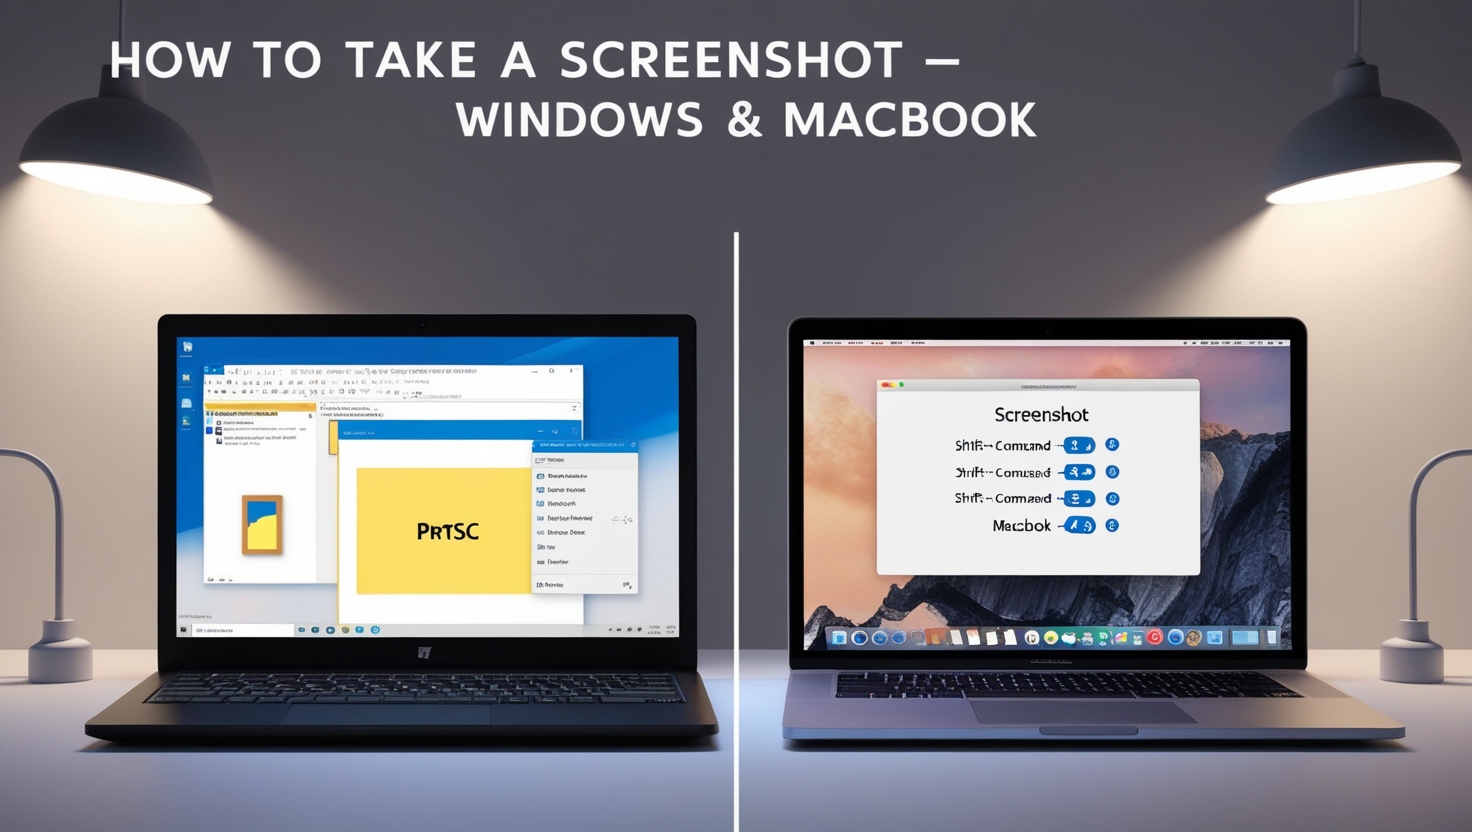
Laptop screen capture helps you keep important data and is more convenient to review. Let's see how to take a screens...
It is extremely important to adjust the screen brightness to suit the eyes. Below, TipsLifeZ will guide you on how to...

You are afraid that you will fall asleep when you are installing a fairly heavy software and have not yet had time to...

Discover now the top best free AI tools today, supporting you to write content, create images, edit videos, and learn...
A laptop is a commonly used device today. However, over time, it can start to slow down or lag. Join TipsLifeZ to dis...

You want to know whether the computer configuration you're using is strong or weak and what corresponding devices you...

There are many types of chips on the market, making it difficult for users to choose the right one for their laptops....
Laptop screen capture helps you keep important data and is more convenient to review. Let's see how to take a screens...

After upgrading to the latest version of Microsoft's operating system, you feel that your computer is slowing down, a...
Windows 10 is the inheritance and development of Windows 7 and 8 with some interesting features. Let's find out how t...
A laptop is a commonly used device today. However, over time, it can start to slow down or lag. Join TipsLifeZ to dis...